
Side Dishes
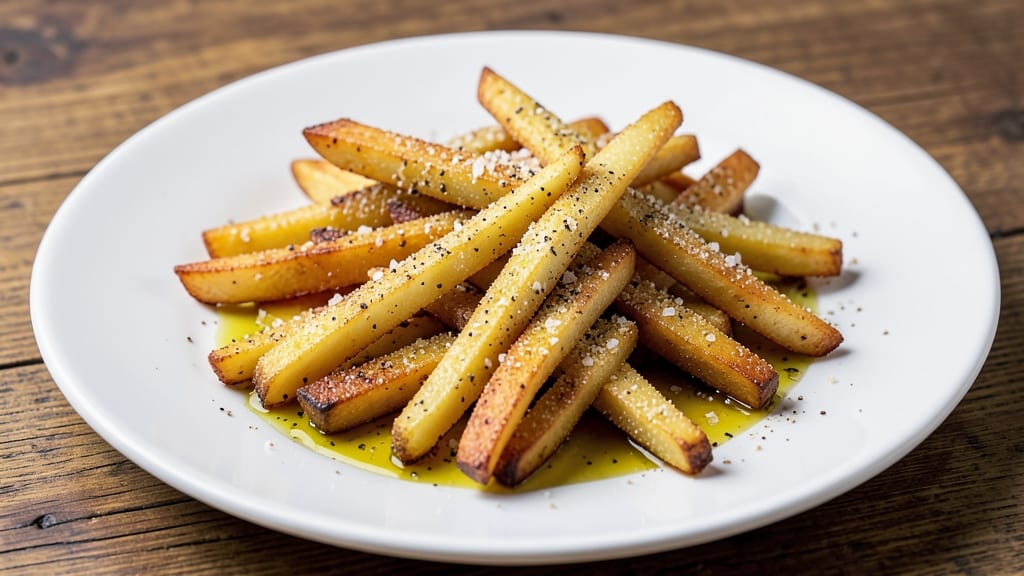
This baked potato sticks recipe delivers crispy, restaurant-quality bites that take just 20 minutes—no frying required. The secret lies in parboiling the sticks first, then baking them at high heat until golden and shatteringly crisp.
I've perfected this method over countless batches, ensuring every stick stays perfectly crunchy without turning greasy.
What sets these apart is the two-step drying process: after parboiling, you'll pat them dry twice to eliminate all moisture, which is critical for achieving that ideal crispy texture.
The seasoning—simple salt and pepper—lets the natural potato flavor shine while enhancing the crunch. This method works with any potato variety, but russets deliver the best results.
By the time they emerge from the oven, you'll have golden, crispy potato sticks that hold their shape and deliver satisfying crunch with every bite. The parboiling step also prevents them from turning mushy, a common issue with oven-baked potato sticks.
Serve them immediately with your favorite dipping sauce for the ultimate snack experience.
These potato sticks are perfect for game day, movie nights, or as a healthier alternative to fries. The recipe scales easily, so you can make a single serving or enough for a crowd. Here's everything you need to create them at home—no deep fryer required.
Ingredients for baked potato sticks
Crispy, golden potato sticks start with these eight essential ingredients—no deep fryer needed!
| Ingredient | Amount | Notes |
|---|---|---|
| Russet Potatoes 🥔 | 2 lb | Cut into 1/4-inch sticks, parboiled |
| Extra-Virgin Olive Oil 🫒 | 1 tbsp | For tossing after drying |
| Diamond Crystal Kosher Salt 🧂 | 1 ½ tsp | Fine grain preferred |
| Freshly Ground Black Pepper 🌶️ | ½ tsp | Coarse grind for texture |
| Cornstarch 🌾 | 1 tbsp | For extra crispiness |
| Garlic Powder 🧄 | ½ tsp | Optional for flavor |
| Paprika 🌶️ | ¼ tsp | Smoked for depth |
| Fresh Parsley 🌿 | ¼ cup | Chopped, for garnish |
Russet potatoes are non-negotiable for this recipe—their high starch content delivers that perfect crispy exterior. Grab 2 pounds from the grocery store's fresh produce section, where they're usually sold in bags. Look for potatoes that feel firm and have smooth, unblemished skin. If you can't find russets, Yukon Golds work in a pinch, though they'll be slightly less crispy. The key is cutting them into even 1/4-inch sticks—use a mandoline if you're feeling fancy, or a sharp knife if you're more casual. Just be consistent with the thickness for even cooking.
No cornstarch? All-purpose flour at the same amount works, though it won't be quite as crispy. Short on olive oil? Avocado oil or melted coconut oil are great swaps—they both have high smoke points. The seasoning blend is flexible: if you're not a fan of smoked paprika, regular paprika or a pinch of cayenne adds heat instead. Fresh parsley is optional but adds a pop of color and freshness. Pro tip: Toast your spices briefly in a dry pan before using to deepen their flavor—takes 30 seconds and makes a huge difference.
These sticks are best served immediately after baking, but if you need to hold them, keep them in a 200°F oven for up to 10 minutes to maintain crispiness. For storage, let them cool completely, then transfer to an airtight container with a paper towel to absorb any moisture. They'll stay fresh for 2 days this way. For longer storage, freeze them on a baking sheet first (don't skip this step—they'll clump if frozen directly), then transfer to a freezer bag. Frozen sticks keep for 3 months and can be baked straight from frozen—just add 2-3 minutes to the baking time.
Why You'll Love This Recipe
- No-Fuss Prep: I swear by this recipe because it’s the kind of thing you can make while scrolling through your phone—just slice, toss, and bake. The potatoes need zero soaking or fancy techniques, and the cornstarch coating ensures that crispy texture without the mess.
- Crispy-Creamy Magic: That perfect crunch on the outside with a fluffy interior? It’s all in the olive oil and kosher salt combo. Honestly, the first time I tried it, I nearly burned my mouth because it’s that good—simple ingredients, but the flavor pops.
- Game for Any Meal: Between us, these sticks are my go-to for game day snacks, a quick lunch with hummus, or even a side for dinner when I’m too tired to think. They reheat like a dream (if they even last that long).
- Budget Crunch: Russets are cheap, and you’ll get way more servings than you’d think from one bag. I’ve made these for six people with leftovers for lunch—zero waste, zero guilt, and zero breaking the bank.
Step-by-step instructions for crispy baked potato sticks
Here's how to achieve that perfect balance of crispy, golden edges and tender centers every time.
Parboil the Potato Sticks for Even Cooking
Preheat your oven to 425°F while you prepare the potatoes. Peel the 2 lb Russet Potatoes if you prefer smooth skins, then cut them into ¼-inch thick sticks using a mandoline or sharp knife. For uniform cooking, I like to cut them into 2-inch long pieces—this size gives you perfect crispiness without burning.
Place the potato sticks in a single layer in a large pot and cover with cold water. Bring to a boil over medium-high heat, then reduce to a simmer for 5 minutes. This partial cooking ensures they finish baking evenly without drying out. Drain thoroughly in a colander, then transfer to a clean kitchen towel and pat completely dry. Any remaining moisture will steam the sticks instead of crisping them.
Season and Toss for Maximum Crispiness
In a large bowl, combine the drained potato sticks with 1 tablespoon cornstarch, 1.5 teaspoons Diamond Crystal kosher salt, 0.5 teaspoon freshly ground black pepper, 0.5 teaspoon garlic powder, and 0.25 teaspoon paprika. The cornstarch is your secret weapon—it creates an extra-crispy exterior while keeping the inside tender. Toss everything together until the sticks are evenly coated.
I always use my hands for this step—it helps distribute the seasoning more evenly than a spoon. If you're worried about the sticks sticking, wet your hands slightly with water first. The paprika adds a subtle smoky depth, while the garlic powder gives a gentle savory kick without overpowering the potato's natural flavor.
Bake in Two Batches for Perfect Crispiness
Arrange the potato sticks in a single layer on two rimmed baking sheets lined with parchment paper. I work in batches to ensure even browning—overcrowding leads to steaming instead of crisping. Leave about ½ inch between each stick so hot air can circulate freely around them.
Place the baking sheets in the preheated 425°F oven and bake for 15-18 minutes, flipping the sticks halfway through at the 8-9 minute mark. You're looking for deep golden brown edges with just a hint of crispiness when you press them gently. The internal temperature should reach 185°F—use an instant-read thermometer to check the thickest stick. If they're browning too quickly, reduce the oven temperature to 400°F for the second half of baking.
Finish with Olive Oil for Extra Crunch
Remove the potato sticks from the oven and immediately drizzle with 1 tablespoon extra-virgin olive oil. Toss gently with tongs to coat evenly—this step elevates the crispiness to restaurant-quality levels. The oil penetrates the hot potato surface, creating a glossy, crackly exterior while keeping the inside perfectly tender.
Transfer the sticks to a serving platter and garnish with ¼ cup chopped fresh parsley. The parsley adds a pop of color and freshness that balances the rich, savory flavors. Serve immediately while they're at their crispest—these won't wait! For extra indulgence, dip in your favorite ranch or garlic aioli.
Troubleshooting for Perfect Results
If your sticks aren't crispy enough, try increasing the oven temperature to 450°F for the final 5 minutes of baking. For extra insurance, broil on high for 1-2 minutes at the very end—just watch them like a hawk to prevent burning. I've found that using a dark baking sheet helps create a better Maillard reaction for deeper browning.
For storage, let the sticks cool completely, then place them in an airtight container. They'll keep at room temperature for 2 days or in the refrigerator for 5 days. To reheat, spread them on a baking sheet and warm in a 375°F oven for 5-7 minutes until crispy again. The key is to reheat them in a single layer so they don't steam back to sogginess.
Pro Tips For Making Baked Potato Sticks
- CUT POTATOES THIN AND EVEN: I learned this the hard way—uneven sticks bake at different rates, leaving some raw inside while others burn. Aim for ¼-inch thickness (about the width of your pinky finger) and keep them consistent so they crisp together.
- DRY THEM WELL BEFORE COATING: Freshly cut potatoes release moisture, which ruins the crisp. Toss them on a wire rack for 10-15 minutes (yes, even if you’re impatient like me) so the cornstarch sticks instead of turning into glue.
- USE A MIXED-OIL TINY LAYER: Extra-virgin olive oil is great, but it burns easily on high heat. Lightly coat the sticks with 1 tablespoon oil total (about ½ teaspoon per stick) and toss with cornstarch—this guarantees a crispy crust without grease splatter.
- SHIFT THE OVEN RACK MIDWAY: The top third of the oven gets scorching hot, but the bottom stays too cool. After 12 minutes, swap the tray to the middle rack for even browning—this is the thing that matters most for golden, not burnt, edges.
Common mistakes when making your baked potato sticks
Skipping the Parboil
One of the biggest mistakes is skipping the parboiling step entirely. Without it, your potato sticks will cook unevenly—some pieces will be raw inside while others burn on the outside. The 5-minute simmer in water ensures even cooking and prevents that dreaded mushy center.
I learned this the hard way after making a batch with raw spots that needed another 10 minutes in the oven. 🥔
Not Drying Thoroughly
Moisture is the enemy of crispiness. After parboiling, I can't stress enough how important it is to pat the sticks completely dry with a kitchen towel. Any lingering water will steam the potatoes instead of crisping them.
I've seen people skip this step and end up with sad, limp sticks that taste more like boiled potatoes than crispy snacks. Use two towels for the best results.
Overcrowding the Pan
When baking, resist the urge to fit as many sticks as possible on your sheet. Overcrowding causes them to steam instead of crisp, resulting in soggy edges. Leave at least ½ inch between each stick for proper airflow.
I always work in batches if needed—it's worth the extra time to get that perfect crunch. 🌡️
Using Wrong Potato Type
Not all potatoes are created equal for crispy sticks. Russets are non-negotiable—their high starch content is essential for that signature crunch. I've tried Yukon Golds and sweet potatoes, but nothing beats the texture of russets.
If you must use a substitute, try Idaho potatoes, which are essentially a cousin to russets. The wrong potato variety will give you a mealy, unappetizing result.
Inconsistent Stick Thickness
Uneven thickness leads to uneven cooking—some sticks will be crispy while others remain doughy. Use a mandoline or sharp knife to cut all sticks to ¼-inch thickness. I measure each piece with calipers to ensure consistency.
Skipping this precision step is the fastest way to end up with a mixed bag of textures that ruin the whole batch.
Baking Too Long at Low Heat
Low and slow baking produces tender sticks, not crispy ones. The key is high heat (425°F) for a shorter time. I've seen people bake these at 375°F for 30 minutes, resulting in sticks that are more like fries than the crispy, shatteringly crunchy texture we want.
High heat creates that perfect Maillard reaction for golden-brown edges in 15-18 minutes. 🔥
Nutrition facts
Frequently asked questions about crispy baked potato sticks
Can I make these potato sticks without parboiling first?
Parboiling is key for even cooking! Without it, your sticks may end up raw inside or burnt outside. The 5-minute simmer ensures perfect doneness while preventing that dreaded mushy center. Think of it as pre-cooking insurance for crispy results every time.
What's the secret to getting them extra crispy?
Three things: thorough drying (pat with two towels), high heat (425°F), and the cornstarch coating. The cornstarch creates a crispy crust while keeping insides tender. Don't skip the olive oil toss after baking—it adds that restaurant-quality crunch!
How do I store leftover baked potato sticks?
Let them cool completely, then store in an airtight container with a paper towel to absorb moisture. They'll stay fresh at room temperature for 2 days or in the fridge for 5 days. To reheat, spread on a baking sheet and warm at 375°F for 5-7 minutes until crispy again. Never microwave—they'll turn soggy!
Can I use sweet potatoes instead of russets?
Sweet potatoes won't give you the same crispy texture—russets are non-negotiable for that signature crunch. Their high starch content is essential. If you must substitute, try Idaho potatoes, which are russet cousins. Sweet potatoes work better for fries than crispy sticks.
Why do my sticks turn out soggy?
Most likely from moisture or overcrowding. Always pat sticks completely dry after parboiling and leave ½ inch space between them on the baking sheet. Also check your oven temperature—425°F is crucial for crispiness. If they're still soggy, try broiling for 1-2 minutes at the end.