
Side Dishes
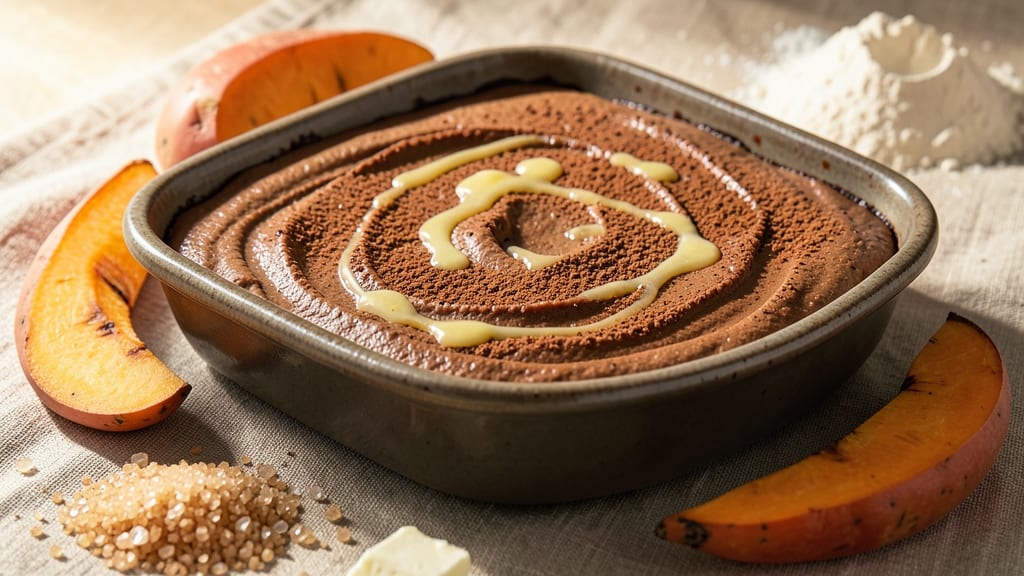
This sweet potato brownie batter recipe transforms humble sweet potatoes into decadent, fudgy brownies with a secret veggie boost you won’t taste. 💛 The key lies in blending roasted sweet potato into rich chocolate batter, creating a texture that’s impossibly moist yet dense—like a cross between classic brownie and cake.
What makes this recipe work is the balance of cocoa powder, melted butter, and a touch of espresso powder for depth, all while keeping the process straightforward for home bakers.
The result is a batch of brownies with a fudgy center and crispy edges, where the natural sweetness of the sweet potato enhances the chocolate flavor without overpowering it. No one will guess there’s a vegetable involved—just rich, satisfying bites that disappear faster than you can say "second helping."
This recipe also bakes up beautifully, with a crackly top that signals perfect doneness every time.
Perfect for dessert lovers who want something healthier without sacrificing indulgence, these brownies are ideal for potlucks, holiday gatherings, or whenever you crave a treat that feels special. The batter can be made ahead and baked fresh, ensuring warm, gooey brownies straight from the oven.
For extra decadence, top with a sprinkle of flaky sea salt or a dusting of powdered sugar before serving.
Adjust the sweetness to your taste by adding more or less brown sugar, and use this recipe as a base for experimenting with mix-ins like chocolate chips, chopped nuts, or even a swirl of peanut butter.
The possibilities are endless, but the foundation is foolproof—guaranteed to impress even the most skeptical chocolate lovers.
Ingredients for sweet potato brownie batter
Rich chocolate, roasted sweet potato, and a touch of espresso for depth—these ingredients create decadent brownies with a hidden veggie boost.
| Ingredient | Amount | Notes |
|---|---|---|
| Medium Sweet Potatoes 🍠 | 1 ½ lb | Peeled and roasted until tender |
| Unsalted Butter 🧈 | ¾ cup | Melted and cooled slightly |
| Granulated Sugar 🍚 | 1 cup | Or light brown sugar |
| Light Brown Sugar 🍚 | ½ cup | Packed tightly |
| Cocoa Powder 🍫 | ¾ cup | Natural or Dutch-processed |
| All-Purpose Flour 🌾 | 1 cup | Sifted for best texture |
| Espresso Powder ☕ | 1 tbsp | Enhances chocolate depth |
| Vanilla Extract 🌸 | 1 tsp | Pure vanilla preferred |
| Baking Powder 🍞 | ½ tsp | Ensures proper rise |
| Salt 🧂 | ½ tsp | Fine sea salt preferred |
| Large Eggs 🥚 | 2 whole | Room temperature |
| Chocolate Chips 🍫 | 1 cup | Semi-sweet preferred |
| Flaky Sea Salt 🧂 | 1 tbsp | For garnish (optional) |
Sweet potatoes are the secret star here. Orange-fleshed varieties like Jewel or Beauregard work best—they're naturally sweet and blend smoothly into the batter. Trader Joe's and Whole Foods carry pre-peeled ones for convenience, but peeling and roasting yourself ensures the best texture. Roast them until tender (about 45 minutes at 400°F), then mash until completely smooth. No lumps, or your brownies will be grainy. The cocoa powder matters too—Valrhona or Ghirardelli brands add that professional richness, but store-bought works fine if it's natural cocoa (no Dutch-processed if you want that tangy bite).
No espresso powder? Instant coffee granules at half the amount work in a pinch, though the flavor won't be as deep. Swapping brown sugar for white? Add 1 tsp molasses to mimic the moisture and caramel notes. The butter should be melted but not hot—just cool enough to touch. For a nutty twist, fold in chopped walnuts or pecans at the end. Chocolate chips can be any variety, but Enjoy Life brand is a safe bet if you're avoiding dairy. The sea salt? Maldon flakes are ideal, but any flaky salt will do—just sprinkle it on right before baking for that perfect balance of sweet and salty.
Batter keeps for 3 days in the fridge, covered tightly. For longer storage, freeze in an airtight container for up to 3 months. Thaw overnight in the fridge before baking. These brownies reheat beautifully—wrap a slice in foil and microwave for 20 seconds. Pro tip: Underbake by 2 minutes for that gooey center everyone loves. And if you're making ahead? Bake them 1 day before serving—they develop even more flavor as they sit.
Why You'll Love This Recipe
- Here’s what sold me: the cocoa and brown sugar team up for a deep, fudgy bite, but the sweet potato keeps it from tasting like a heavy dessert. It’s like a brownie got a cozy, earthy hug.
- I’ll be real: this recipe won’t break the bank. Sweet potatoes last forever, and the rest of the ingredients? Basic stuff you probably already have. Plus, the leftovers reheat like a dream—no sad, dry brownies here.
Step-by-step instructions for sweet potato brownies
Here's how to transform roasted sweet potatoes into fudgy, decadent brownies with rich chocolate depth.
👨🍳 Step 1: Roast the Sweet Potatoes Until Silky
Preheat your oven to 400°F. Pierce the 1.5 lb medium sweet potatoes with a fork in several places, then place them on a baking sheet. Roast for 45-50 minutes until completely tender when pierced with a knife. You'll know they're ready when the flesh collapses easily and the skin is slightly charred.
Let the sweet potatoes cool slightly before handling. Once cool enough to handle, scoop out the flesh and discard the skin. You should have about 1½ cups of roasted sweet potato purée. I like to press it through a fine-mesh sieve to remove any fibrous bits—this ensures a smooth, velvety texture in your brownies.
🍳 Step 2: Melt Butter and Combine Wet Ingredients
In a medium saucepan, melt the 0.75 cup unsalted butter over low heat. Once fully melted, remove from heat and let cool for 5 minutes—you want it warm to the touch but not hot. In a large mixing bowl, combine the cooled butter with the roasted sweet potato purée, 1 cup granulated sugar, 0.5 cup light brown sugar, 2 whole large eggs, 1 tsp vanilla extract, and 1 tbsp espresso powder.
Whisk everything together until smooth and fully incorporated. The espresso powder might seem unusual, but it deepens the chocolate flavor—trust me, it makes a difference. The mixture should be thick but pourable, with no graininess from the sweet potato.
🥘 Step 3: Add Dry Ingredients and Fold in Chocolate
In a separate bowl, sift together the 1 cup all-purpose flour, 0.75 cup cocoa powder, 0.5 tsp baking powder, and 0.5 tsp salt. Gradually whisk these dry ingredients into the wet mixture until just combined—you're looking for a thick, fudgy batter with no flour streaks remaining.
Remove the bowl from the mixer and gently fold in the 1 cup chocolate chips using a silicone spatula. Be careful not to overmix; you want the chocolate chips distributed evenly but still visible throughout the batter. The texture should be thick and slightly sticky—this is perfect for fudgy brownies.
🔥 Step 4: Bake Until Fudgy Perfection
Preheat your oven to 350°F and line an 8x8-inch baking pan with parchment paper, leaving an overhang on the sides for easy removal. Pour the brownie batter into the prepared pan and smooth the top with a spatula. Sprinkle the 1 tbsp flaky sea salt evenly over the top—this enhances the chocolate flavor and adds a delightful contrast.
Bake for 25-30 minutes until a toothpick inserted in the center comes out with moist crumbs but no wet batter. The edges should be set, but the center should still look slightly underdone—this ensures maximum fudginess. If the top starts to brown too quickly, tent the pan with aluminum foil.
⏰ Step 5: Cool and Cut for Maximum Fudginess
Remove the brownies from the oven and let them cool in the pan for 15 minutes. Then, use the parchment overhang to lift the brownies out and place them on a wire rack to cool completely. This cooling process is crucial—rushing it will result in crumbly brownies instead of that perfect fudgy texture.
Once fully cooled, cut into 16 squares (for 4 servings) using a sharp knife. The brownies should be dense, moist, and rich with chocolate flavor—each bite should deliver that perfect balance of sweetness and fudgy depth. Store any leftovers in an airtight container at room temperature for up to 3 days.
Pro Tips For Making Sweet Potato Brownie Batter
- Boil Potatoes Until Fork-Tender: I learned this the hard way—soft, mushy sweet potatoes turn your brownie batter into a dense, gummy mess. Boil whole, unpeeled medium potatoes until a fork slides in without resistance (about 20-25 minutes). The skin adds texture, but even if you peel, don’t stop at "soft"—keep going until it’s just shy of falling apart.
- Melt Butter Slowly: Cranking the heat on butter for this recipe is how I ended up with burnt cocoa notes instead of rich chocolate flavor. Melt the butter over medium-low, stirring occasionally, until it’s just liquid and barely golden—no bubbles, no browning. Cold butter won’t emulsify properly, and hot butter will scorch your sugars.
- Sift the Cocoa Twice: Lumpy cocoa powder is the fast track to dry, crumbly brownies. Sift it before measuring, then sift it again right into your mixing bowl. I used to skip this, and the texture always suffered—like eating a cake that forgot to be moist. Trust me, the extra 10 seconds makes a real difference.
- Use Room-Temp Eggs: Cold eggs in this batter create pockets of steam that make your brownies crack and sink in the center. Pop them out of the fridge 30 minutes before mixing, or even better, let them sit in warm water for 5 minutes. Your future self will thank you when the pan comes out with a smooth, fudgy center.
Common mistakes when making perfect results
Overmixing the Batter
This is the #1 mistake that turns fudgy brownies into cakey disappointments. Once you fold in the 1 cup chocolate chips, stop mixing immediately—just until they're evenly distributed. Overmixing develops gluten in the 1 cup all-purpose flour, making your brownies tough instead of tender.
I've seen home bakers whisk for 2-3 minutes extra and end up with dense, dry results. Use a silicone spatula and fold just until combined, then let the batter rest for 10 minutes before baking. 💫
Skipping the Cooling Step
Rushing the cooling process is what separates good brownies from great ones. Cutting into them too soon after baking (like right at 15 minutes) disrupts the texture, making them crumbly. The 1½ cups roasted sweet potato purée needs time to fully set and distribute its moisture.
Let them cool completely on a wire rack for at least 1 hour before cutting. I've made this mistake at holiday parties—trust me, the difference is night and day. 🍫
Incorrect Sweet Potato Texture
Using lumpy or undercooked sweet potato purée is a game-changer for texture. If you skip sieving the roasted sweet potatoes, you'll get grainy brownies that lack that silky mouthfeel. The purée should be completely smooth—press it through a fine-mesh sieve if needed.
Also, don't over-roast them! Sweet potatoes should be tender but not dried out. I've had batches where the purée was too dry, making the brownies dense and less fudgy. Aim for 45-50 minutes at 400°F until they're fork-tender. 🍠
Wrong Baking Temperature
Baking at too high a temperature (375°F+) causes the outside to brown too quickly while the center stays undercooked. The ideal 350°F allows even cooking throughout.
I've seen home bakers crank the oven to 400°F thinking it would help, but this leads to burnt edges and a raw center. Use an oven thermometer to verify your oven's accuracy—many run hotter than set.
Also, tent with foil if the top browns too quickly, but don't overdo it or the center won't cook properly. ⏰
Measuring Dry Ingredients Wrong
Packing the 0.5 cup light brown sugar loosely instead of tightly changes the moisture content dramatically. Use a light tap to settle it into the measuring cup, then level with a knife—don't scoop directly from the bag.
For the 1 cup all-purpose flour, spoon it into the measuring cup and level it off, or use the "dip and sweep" method for accuracy. I've had batches where the sugar was packed too loosely, making the brownies less fudgy and more cake-like. Precision matters here! 🌾
Ignoring the Sea Salt
While optional, the 1 tbsp flaky sea salt isn't just for flavor—it balances the sweetness and enhances the chocolate. Sprinkle it evenly over the top right before baking, not after. I've made this mistake by adding it after cooling, which makes it clump and lose its delicate texture.
The salt should be distributed evenly across the surface, not concentrated in one spot. This simple step elevates the entire dessert experience. 🧂
Nutrition facts
Frequently asked questions
Can I make these brownies without roasting the sweet potatoes?
You can try using 1½ cups cooked sweet potato (boiled or steamed) instead, but the texture won't be as rich. Roasting caramelizes the natural sugars, creating that deep, velvety sweetness. For a quick alternative, microwave the peeled sweet potato for 8-10 minutes until tender, then mash it thoroughly. The flavor will be milder but still delicious.
How do I adjust the sweetness for kids or picky eaters?
Add 2-3 tablespoons more brown sugar to the wet ingredients for a sweeter taste. For extra richness, fold in ½ cup marshmallow fluff or ¼ cup peanut butter into the batter. If you prefer less sweetness, reduce the brown sugar by 1-2 tablespoons—the natural sweetness of the sweet potato will still shine through.
Can I use this batter for cupcakes instead of brownies?
Divide the batter evenly into a 12-cup muffin tin lined with liners, filling each cup ⅔ full. Bake at 350°F for 18-20 minutes until a toothpick comes out clean. The texture will be slightly cake-like but still fudgy. Top with whipped cream or a dusting of powdered sugar for a fun twist.
Why did my brownies turn out cakey instead of fudgy?
Overmixing the batter or using too much flour are the most likely culprits. For fudgy results, fold the chocolate chips in just until combined and avoid overworking the batter. Also, ensure your cocoa powder is natural (not Dutch-processed) and use the exact amount of 1 cup flour—no substitutions. If your oven runs hot, reduce the temperature to 325°F.
How can I make these brownies gluten-free?
Replace the 1 cup all-purpose flour with a 1:1 gluten-free baking flour blend (like Bob's Red Mill or King Arthur). For best results, add ½ teaspoon xanthan gum to help bind the texture. You may also need to reduce the liquid slightly—start with ½ cup less milk if using. Test the batter consistency first; it should be thick but pourable.